
Your Anker Smart Home Power Kit offers a streamlined way to enhance your living space. You’ll start with a straightforward unboxing, followed by a simple setup process. Connecting your devices is intuitive, and the mobile app provides seamless management. Plus, with energy monitoring features, you can optimize usage effectively. But before you plunge into the details, let’s explore the initial setup that lays the foundation for your smart home experience.
Key Takeaways
- Unbox the Anker Smart Home Power Kit, ensuring all components like power hub and smart plugs are included and easily identifiable.
- Connect the device to Wi-Fi and follow app installation steps for smooth integration and optimal performance.
- Download the Anker app, create an account, and grant necessary permissions to manage your smart devices effectively.
- Pair compatible devices using Wi-Fi, Zigbee, or Bluetooth, ensuring proper connections for functionality and performance.
- Utilize energy management features to monitor consumption, set timers, and receive alerts on usage to enhance efficiency.
Unboxing Your Anker Smart Home Power Kit
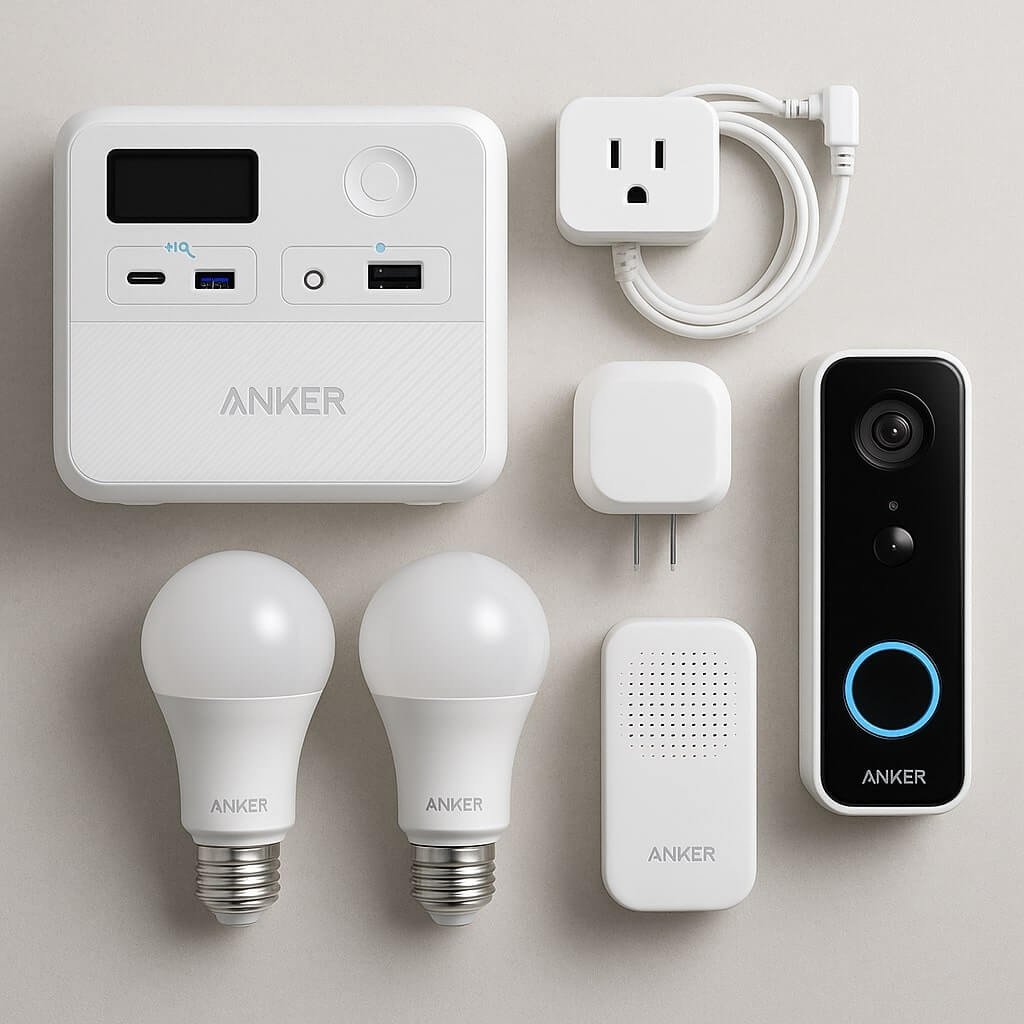
When you open the box of your Anker Smart Home Power Kit, you’ll find everything you need to get started with your smart home setup.
The packaging design is sleek and organized, ensuring that each item is securely housed. Inside, you’ll discover the main power hub, smart plugs, and a detailed user manual.
Alongside these, included accessories like mounting hardware and Ethernet cables enhance your installation options. Each component is thoughtfully arranged, allowing for easy identification.
This efficient setup not only promotes a seamless unboxing experience but also sets the stage for your smart home journey. Enjoy the convenience!
Initial Setup and Installation
Now that you’ve unboxed your Anker Smart Home Power Kit, it’s time to set it up.
Start by connecting the device to your Wi-Fi network, ensuring a stable connection for ideal performance.
Next, follow the app installation steps to get everything running smoothly and seamlessly integrate the kit into your smart home system.
Unboxing the Power Kit
Unboxing the Anker Smart Home Power Kit reveals a carefully organized collection of components designed for seamless installation and ideal performance.
The packaging design not only protects the contents but also makes it easy to identify each part. Inside, you’ll find the main power hub, smart plugs, a user manual, and necessary cables.
Each accessory is neatly placed, minimizing the risk of loss or damage. As you inspect the accessory contents, take note of the various connectors and adapters included, which will be essential for compatible integration into your home.
You’re now ready to move on to the next steps!
Connecting to Wi-Fi
How do you get your Anker Smart Home Power Kit connected to Wi-Fi? Follow these steps to guarantee peak network stability and wi-fi security:
- Position the Kit: Place your Power Kit within range of your Wi-Fi router to enhance signal strength.
- Power Up: Plug in the kit and wait for the LED light to indicate it’s ready for setup.
- Select Network: Use the designated app to choose your Wi-Fi network and enter the password.
- Confirm Connection: Verify the connection through the app, guaranteeing that your kit is securely linked to your Wi-Fi network.
App Installation Steps
Once you’ve successfully connected your Anker Smart Home Power Kit to Wi-Fi, it’s time to install the accompanying app for full functionality.
Start by downloading the Anker app from your device’s app store. After installation, open the app and create an account or log in.
Follow the prompts to connect your Smart Home Power Kit, ensuring you grant necessary permissions for peak app features.
Familiarize yourself with the user interface, where you can manage devices, set schedules, and monitor energy usage.
Regularly update the app to access new features and enhancements, ensuring your smart home experience remains seamless and efficient.
Connecting Your Devices
As you prepare to connect your devices, make certain that your Anker Smart Home Power Kit is properly set up and powered on.
Understanding device compatibility and connection protocols is essential for a seamless experience. Follow these steps:
- Identify Compatible Devices: Check if your devices support the Anker Smart Home standards.
- Select Connection Protocols: Use Wi-Fi, Zigbee, or Bluetooth as needed for your devices.
- Establish Connections: Pair each device according to its specific protocol requirements.
- Test Functionality: Confirm each device responds correctly to commands for best performance.
With these steps, you’ll connect your devices effortlessly.
Utilizing the Mobile App
To maximize the functionality of your Anker Smart Home Power Kit, you’ll want to download and install the mobile app, which serves as your control hub for managing connected devices.
Download the Anker Smart Home app to effectively manage and control all your connected devices.
The app functionality overview provides seamless access to all your devices, allowing you to monitor and control them efficiently.
For best use, familiarize yourself with user interface tips: customize your dashboard for quick access, set up notifications for device activity, and explore the settings menu for advanced features.
With the app, you can easily schedule operations and guarantee your smart home runs smoothly, enhancing your overall experience.
Energy Management Features
The Anker Smart Home Power Kit includes robust energy management features that help you monitor and optimize your energy consumption.
You can leverage these tools to enhance efficiency and save on costs. Here are some key features:
- Real-Time Monitoring: Track your energy consumption live, identifying spikes or trends.
- Usage Analytics: Analyze historical data to make informed decisions about your energy habits.
- Scheduling Options: Set timers for devices to run during off-peak hours.
- Alerts & Notifications: Receive updates on excessive usage, ensuring you stay within budget.
These features empower you to take control of your energy usage effectively.
Troubleshooting Common Issues
When you encounter issues with the Anker Smart Home Power Kit, knowing how to troubleshoot effectively can save you time and frustration. Start by checking for common errors like device compatibility issues. Verify that your devices support the Anker system. If you experience connectivity problems, reset your Wi-Fi router and the Smart Home Kit. Below is a handy troubleshooting table:
| Issue | Solution |
|---|---|
| Device won’t connect | Check device compatibility |
| Intermittent power supply | Inspect power connections |
| App not responding | Restart the app and device |
| Firmware update needed | Follow update instructions |
Best Practices for Optimizing Your Smart Home
While optimizing your smart home can seem intimidating, implementing a few best practices can enhance functionality and efficiency considerably.
Here are some key strategies to take into account:
- Leverage Smart Lighting: Use energy-efficient smart bulbs to control brightness and color, creating the perfect ambiance.
- Implement Device Scheduling: Set up schedules for devices to operate during off-peak hours, saving energy and costs.
- Group Devices: Create groups for similar devices for easier control with voice commands or apps.
- Regular Software Updates: Keep your devices updated to guarantee security and access to new features.
These tactics will streamline your smart home experience.
Conclusion
By following this guide, you can effortlessly integrate your Anker Smart Home Power Kit into your daily life. With a seamless unboxing experience, straightforward installation, and powerful energy management features, you’re well-equipped to enhance your home’s efficiency. Don’t hesitate to explore the mobile app for real-time monitoring and customizable settings. Remember, troubleshooting is just a step away, and by applying best practices, you’ll optimize your smart home experience for maximum convenience and energy savings.