
Replacing chipped curb sections is a crucial maintenance task that keeps your property safe, attractive, and structurally sound. When and how to replace chipped curb sections effectively can save you money, prevent accidents, and enhance curb appeal. In this article, you’ll find 10 essential tips covering everything from identifying damage to choosing the right materials and techniques for durable repairs. Whether you’re a DIY enthusiast or considering hiring a professional, understanding the process will empower you to make informed decisions.
Understanding Chipped Curbs: Causes and Consequences
Chipped curbs are a common problem in urban and suburban areas. They result from various causes like vehicle impacts, harsh weather, poor initial installation, and natural wear over time. When curbs chip, they don’t just look unsightly — they can lead to bigger structural issues, increased risk of tripping hazards, and damage to vehicles or pedestrians. Ignoring chipped curb sections often worsens the damage, leading to costly repairs down the road.
Typical causes include:
- Vehicle collisions: Cars or trucks accidentally hitting the curb.
- Freeze-thaw cycles: Water seeps into cracks, freezes, expands, and breaks the concrete.
- Tree root growth: Roots can lift or crack curbs.
- Heavy loads: Excessive weight can stress and damage curbs.
Understanding these causes helps you identify the right time and approach for replacement.
Signs You Need to Replace a Chipped Curb Section
Knowing when to replace chipped curb sections is key to preventing accidents and escalating damage. Here are common signs that replacement is necessary:
- Visible cracks and large chips: When the surface is broken and pieces are loose or missing.
- Structural instability: Sections that wobble or shift when pressure is applied.
- Trip hazards: Uneven edges or broken chunks pose risks to pedestrians.
- Water pooling: Damaged curbs that no longer drain water properly can cause further erosion.
- Repeated damage: If repairs have been frequent but damage persists, replacement is often the best solution.
Assess your curb condition periodically, especially after storms or construction activity nearby.
Tools and Materials Required for Curb Replacement
Before starting curb replacement, gather the right tools and materials to ensure efficiency and quality. Here’s what you’ll need:
| Tools | Purpose |
|---|---|
| Sledgehammer | Break apart damaged curb sections |
| Concrete saw or grinder | Cut through concrete cleanly |
| Shovel and crowbar | Remove debris and old curb pieces |
| Wheelbarrow | Transport concrete and materials |
| Trowel and float | Smooth and finish new concrete surface |
| Level | Ensure proper slope and evenness |
| Measuring tape | Measure curb sections accurately |
| Safety gear | Gloves, goggles, dust mask for protection |
Materials include:
- Concrete mix or pre-cast curb sections
- Reinforcement mesh or rebar (if needed)
- Curb forms or molds
- Sealant or curing compound
Proper preparation reduces waste and ensures a professional finish.
Step-by-Step Guide to Removing Chipped Curb Sections
Removing the damaged curb correctly lays the groundwork for a successful replacement. Follow these steps:
- Safety first: Wear protective gear, including gloves, goggles, and a dust mask.
- Mark the replacement area: Use chalk or spray paint to outline the section to be removed.
- Cut the curb edges: Use a concrete saw to score clean edges around the damaged section.
- Break up the curb: Use a sledgehammer or jackhammer to break the chipped concrete into manageable pieces.
- Remove debris: Shovel out the broken concrete, ensuring the base is clear of loose material.
- Inspect the base: Check the soil or foundation below for stability. Add gravel or compact soil if needed.
By carefully removing the damaged section, you create a stable base for new curb installation.
How to Prepare the Site Before Installing New Curbs
Preparation is vital for a lasting curb replacement. Here’s how to get the site ready:
- Level the base: Use a tamper to compact soil or gravel, creating a flat, firm surface.
- Set up forms: Place wooden or metal forms to shape the new curb section, ensuring correct height and slope.
- Apply bonding agent: If pouring new concrete adjacent to an old curb, use a bonding adhesive for better adhesion.
- Check drainage: Ensure the area slopes slightly to direct water away from the curb.
Proper site prep reduces cracking and enhances durability.
Best Materials for Replacing Chipped Curbs
Choosing the right material influences the lifespan and appearance of your curb. Common options include:
- Traditional concrete: Durable, widely available, and cost-effective.
- Polymer concrete: More flexible and resistant to chemicals and weathering.
- Pre-cast concrete curbs: Factory-made sections that can be installed quickly.
- Recycled materials: Eco-friendly alternatives made from crushed glass, rubber, or fly ash.
Consider local climate, budget, and aesthetic preferences when selecting materials.
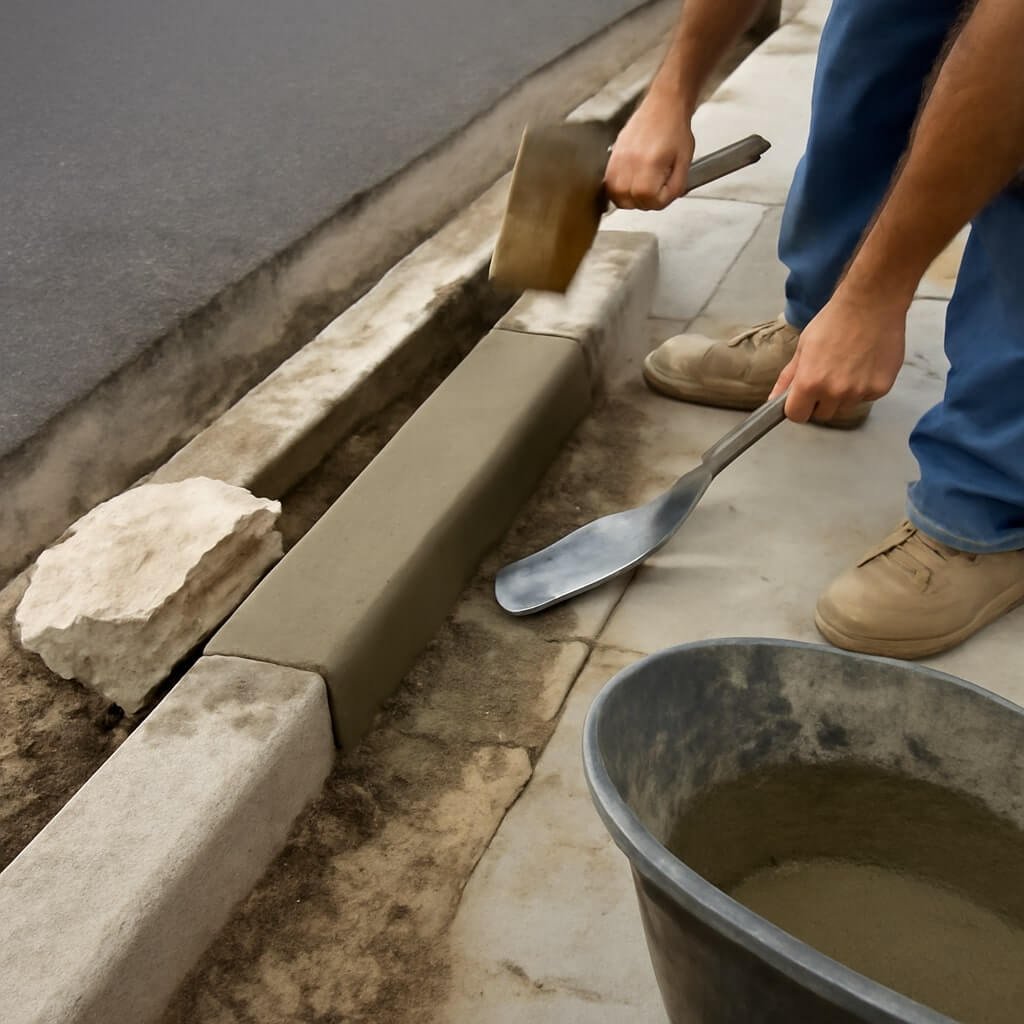
Proper Techniques for Installing New Curb Sections
Correct installation ensures your curb lasts for years:
- Pour concrete evenly: Avoid air pockets by tamping down the mixture during pouring.
- Shape carefully: Use a curb tool or trowel to create smooth edges and the desired profile.
- Control curing: Keep the concrete moist for at least 48 hours to prevent cracking.
- Remove forms after curing: Usually, after 24-48 hours, remove forms carefully to avoid damage.
Attention to detail during installation minimizes future repairs.
How Weather Affects Curb Replacement Projects
Weather plays a significant role in curb replacement success:
- Cold weather: Freezing temperatures can cause concrete to crack before it cures.
- Hot weather: High heat can dry concrete too fast, leading to shrinkage cracks.
- Rain: Moisture during pouring can weaken the concrete mix.
- Best timing: Spring or fall offers optimal temperatures and humidity for curb projects.
Plan your replacement during favorable weather windows for best results.
Maintaining Your New Curbs to Prevent Future Damage
To keep your curbs in top shape:
- Regular cleaning: Remove dirt, debris, and vegetation.
- Seal cracks early: Use concrete sealant to prevent water infiltration.
- Avoid heavy loads: Don’t park heavy vehicles on curbs.
- Inspect annually: Look for chips or cracks and address them promptly.
Routine maintenance extends curb lifespan and preserves safety.
Cost Breakdown: Budgeting for Curb Replacement
Here’s a typical cost range based on project size and materials:
| Expense Category | Typical Cost Range |
|---|---|
| Materials | $3 – $10 per linear foot |
| Labor | $50 – $100 per hour |
| Equipment Rental | $50 – $200 per day |
| Additional Repairs | Variable, based on damage |
DIY can save labor costs but may require tool investment. Professionals provide efficiency but at higher labor rates.
Hiring Professionals vs. DIY Curb Replacement
Pros and cons at a glance:
| Approach | Pros | Cons |
|---|---|---|
| DIY | Cost-saving, flexible schedule | Requires skill and tools |
| Professional | Expertise, faster completion | Higher upfront costs |
Evaluate your skill level, time availability, and budget before deciding.
Common Mistakes to Avoid When Replacing Chipped Curbs
Avoid these pitfalls for a smooth project:
- Skipping site prep or leveling
- Pouring concrete in poor weather
- Using the wrong concrete mix
- Ignoring curing requirements
- Overlooking safety precautions
Proper planning and execution prevent these errors.
Environmental Considerations in Curb Replacement
Eco-conscious options include:
- Using recycled concrete or materials
- Proper disposal of old concrete
- Minimizing chemical sealants
- Selecting locally sourced materials to reduce the carbon footprint
Sustainable choices benefit both your project and the planet.
Frequently Asked Questions About Replacing Chipped Curbs
How long does it take for a new curb section to cure fully?
Can I replace curb sections myself without prior experience?
What is the average lifespan of a replaced curb?
How can I prevent my new curb from chipping again?
Are there any permits required for curb replacement?
What’s the difference between repair and replacement?
Conclusion: Ensuring Longevity and Safety in Curb Repairs
Replacing chipped curb sections at the right time with the correct materials and techniques guarantees durability and safety. Whether you choose DIY or professional help, thorough preparation and maintenance keep your curbs looking great and functioning well for years. Don’t wait until minor damage turns into a costly problem—use these 10 essential tips to make informed curb repair decisions today.